PowerPoint Presentations
USING POWERPOINT
PowerPoint is a very useful way of producing visual material to support
a presentation via videoconference. Children holding pieces of paper can
move about, so that the image is difficult to see clearly, and glare from
the white paper is sometimes a problem too. However a PowerPoint presentation
can be played directly through the videoconference camera, which means
that everyone can see it clearly.
Research suggests that PowerPoint slides can help students to understand a topic provided that the slides are not too complex. Text and graphics that are carefully chosen to support the verbal presentation can enhance the experience - too much content and graphics or special effects which distract do not.
You can use whatever colours, fonts,
pictures you like – although there are some basic rules it’s
as well to consider. For instance, black on red and vice versa don't show up well. Rather
than mixing two strong colours or two pale ones, it is better to mix a
strong colour and a pale one, so that there is a good contrast between
colours, such as cream on dark blue. Having too many special effects can
distract from the content, as can moving through bullet-points too quickly
before people have had time to read them through. It's better if you talk
about what your bullet-points say, so people can read them, and hear someone
commenting in more detail. Avoid the edges of the slides - sometimes these
get lost on the videoconference screen.
You can add photos of displayed work, or students working on their project.
These add interest to the content. You can even add a video via the PowerPoint
file.
We would be very pleased if you sent your PowerPoint file to us after
the final videoconference. We will then display it on our website.
Getting started
in PowerPoint
Open up a new PowerPoint document. Depending on which version of PowerPoint
you are using, you will see something like this:
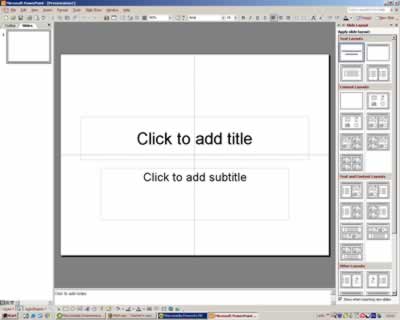 This screenshot shows what you get when you open PowerPoint XP. The main part of the screen shows the title slide.
On the right you can see a range of ways to lay out content. Click on whichever you want. To get a new slide, use Control M, or go to Insert>New
Slide on the top tool bar.
This screenshot shows what you get when you open PowerPoint XP. The main part of the screen shows the title slide.
On the right you can see a range of ways to lay out content. Click on whichever you want. To get a new slide, use Control M, or go to Insert>New
Slide on the top tool bar.
Return to top
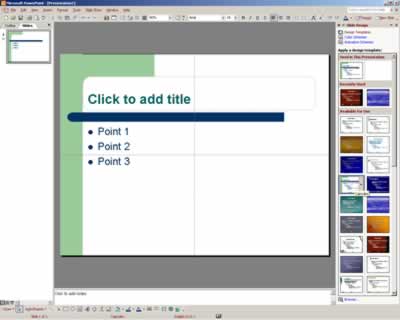
Animating text

If you want your bullet points to show sequentially, rather than all
at once, go to Slide Show on the top tool bar, and select Custom Animation.
This will display a range of different effects which you can choose in a pane on the right.
Once you have selected your effect, you can accompany it with a sound of some kind, or have the text dim when a new bullet point is shown.
Return to top
Using colour and design on your slides
 You also need to consider colour
and background design for your slides. You can use a Design Template from a library of templates by
clicking on Format>Slide Design. This also gives you the option to change a colour scheme or use an animation scheme. You also need to consider colour
and background design for your slides. You can use a Design Template from a library of templates by
clicking on Format>Slide Design. This also gives you the option to change a colour scheme or use an animation scheme.
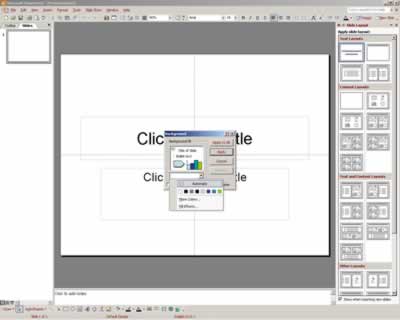 You can change the colour and texture of your background separately,
by selecting Format>Background. Click on the right hand arrow by the
colour bar below your colour scheme – you will see your current
colours displayed, plus options More Colours and Fill Effects. Fill Effects
allows you to choose a textured or patterned background. There are a lot
of different options here. Once you’re happy with your choice, Apply
to all will put your background onto all your slides. You can change the colour and texture of your background separately,
by selecting Format>Background. Click on the right hand arrow by the
colour bar below your colour scheme – you will see your current
colours displayed, plus options More Colours and Fill Effects. Fill Effects
allows you to choose a textured or patterned background. There are a lot
of different options here. Once you’re happy with your choice, Apply
to all will put your background onto all your slides.
Return to top
Presenting your slide show
You can now put your material onto PowerPoint slides,
decide whether you will have bullet-points displayed all at once or sequentially,
and add a design, or colour scheme. All you need to know now is how to display your presentation on the day.
Up to this point you have been working in Slide View, which is the default
view. To start present your slides, either use the F5 key on the keyboard (hich will start the presentation from the first slide)> Alternatively, look at the bottom left of your slides, where you will see this tool bar:

If you hover the mouse above any of the icons, you will see what it
does. On
the left, you have slide view, which is the view in which you edit your slides.
In the middle you have Slide Sorter View. If you click on this, you will see
all your slides displayed in order. In this view, you can change the order
of your slides, just by dragging the slides to the position you want.
On the right you have Slide Show view. If you click on this, the presentation will start from the slide currently selected. To go forward a slide, or
to advance a bullet-point, click the mouse, or use the downward arrow
on the right of the keyboard. To go back a slide or bullet-point, use
the upward arrow.
Run through your presentation in Slide Show View, and make sure you like
what everyone will see. To go back to Slide View for editing, press Esc on the keyboard.
| 
